
Do you ever wish you could bring your favorite cartoon characters to life with just a pencil and paper? Well, you can, and it's a lot simpler than you might think, you know. Learning how to draw Spongebob SquarePants can be a super fun way to start your art adventure, whether you're just picking up a pencil or you've been doodling for a while. This guide is for everyone who loves a good challenge and wants to create something cool.
Lots of people wonder how to draw Spongebob, and it's a popular search, as a matter of fact. This cheerful sea sponge from Bikini Bottom is a favorite for many, and getting his look just right can feel like a big accomplishment. We'll walk through each step together, making sure you get all the details down, so you can draw him from his head to his little cartoon toes.
This beginner's guide, reviewed by artist Jeanine Hattas Wilson, is here to help you sketch a fun and accurate Spongebob SquarePants. You'll learn to draw a great looking Spongebob with easy instructions and a video tutorial that comes with it. By following these simple steps, you too can easily draw a perfect Spongebob, just like the pros. A new cartoon drawing tutorial is uploaded every week, so stay tuned for more fun characters!
Table of Contents
- Getting Ready: Your Art Tools
- The Basics: Starting Your Spongebob
- Bringing His Face to Life
- Adding His Classic Outfit
- Arms, Legs, and Final Touches
- Frequently Asked Questions About Drawing Spongebob
Getting Ready: Your Art Tools
Before you start sketching, it's good to have a few simple things ready. You don't need anything fancy, just some basic art supplies. A pencil, an eraser, and some paper are really all you need to get going, you know. If you want to add color later, grab some crayons, colored pencils, or markers.
A good pencil, like a regular HB or a 2B, works well for light sketches. The eraser will help you fix any little mistakes along the way, which is perfectly normal. Having a clean sheet of paper is also helpful, so you have plenty of room to draw. Some artists like to use a fine-point pen for outlining after sketching, but that's totally up to you, too.
For those who prefer drawing on a screen, there are free online drawing applications available for all ages. These tools let you create digital artwork to share online. You can even export your work into popular image formats like JPEG, PNG, SVG, and PDF, which is pretty neat. You can easily draw, edit photos, or design your next business card with some of these programs, you see. They even let you craft images for social media posts or digital ads.
The Basics: Starting Your Spongebob
Every drawing begins with simple shapes, and Spongebob is no different. We'll start with his main body shape, which is, you know, pretty much a square. Don't press too hard with your pencil at this stage. Keep your lines light, as we'll be erasing some of them later, basically.
Step 1: The Body Shape
To begin, draw a large, somewhat squarish shape in the middle of your paper. It doesn't have to be a perfect square, as Spongebob is a sponge, after all, so his edges are a bit wavy. Think of it more like a slightly wobbly rectangle with rounded corners, you know. This will be the main part of his body.
Make sure this shape is a good size, as it will be the foundation for everything else. If it's too small, adding details might be hard. If it's too big, you might run out of paper, you see. So, try to get it just right in the center of your page.
You can even make the top wider than the bottom, just a little, to give it that classic Spongebob look. This initial shape is just a guide, so don't worry about making it perfect right now. We will refine it later, anyway.
Step 2: Guiding Lines for Features
Next, we need to add some light guide lines to help place his face features. Draw a vertical line down the middle of your square body shape. This line will help you center his nose and mouth, you know. Then, draw a horizontal line across the middle of the square. This line will help you place his eyes.
These lines are very light, just like a cross on his face. They are there to help you keep things even and balanced. Think of them as invisible helpers for your drawing, you know. They make sure his eyes aren't too high or too low, and his nose is right in the middle, basically.
You can adjust these lines a bit if you feel his face needs to be higher or lower. For example, if you want his eyes a bit higher, move that horizontal line up a little. This step really helps keep everything in proportion, you know, which is quite helpful.
Bringing His Face to Life
Spongebob's face is full of character, and getting his expression right is key. We'll start with his big, happy eyes and work our way down to his famous smile. This is where he really starts to look like himself, you see.
Step 3: The Big, Round Eyes
Now, let's draw his two large, round eyes. Place them on the horizontal guide line you made earlier, one on each side of the vertical guide line. They should be quite big and close together, almost touching in the middle, you know.
Inside each large circle, draw a smaller circle for the iris, and then an even smaller circle inside that for the pupil. Leave a tiny white circle in the pupil for a sparkle, which makes his eyes look shiny and alive, you see. This little detail really brings them to life.
Above each eye, draw a short, curved line for his eyelashes. He has three on each eye, pointing upwards. These small lines add to his cheerful look, too. Making sure the eyes are round and big is pretty important for his overall appearance, actually.
Step 4: The Nose and Cheeks
Next, draw his long, somewhat bumpy nose. It starts between his eyes and extends downwards, crossing the horizontal guide line. It's not perfectly straight, it has a few little bumps, you know, which gives it character. It's pretty long, for a nose, anyway.
Underneath his nose, on either side, draw two small, round shapes for his cheeks. These are like little blush spots, and they add to his friendly appearance. They are usually just below his eyes, kind of framing his nose, you know.
These cheek shapes are often drawn with a few tiny dots inside them later, to show his pores, but for now, just the basic round shape is fine. Getting the nose length right is important, as it really defines the middle of his face, you see.
Step 5: That Wide Smile and Teeth
Now for his famous smile! Draw a wide, curved line underneath his nose and cheeks. This line should stretch across his face, almost from one side of his body to the other, really. It's a big, happy curve, basically.
Inside this smile, draw two large, square buck teeth sticking out from the top. These teeth are very distinctive, and they are a key part of his look. They are usually a bit bigger than you might expect, you know, and quite prominent.
Underneath the teeth, draw a small, curved line for his tongue. It's just a little U-shape inside his mouth. This adds a bit more detail to his expression, too. Making sure his smile is wide and cheerful is pretty much the goal here, you know.
Adding His Classic Outfit
Spongebob's outfit is just as iconic as his face. We'll add his shirt, tie, and pants to complete his look. These parts are pretty simple shapes, so you won't have any trouble, you know.
Step 6: The Shirt and Tie
Draw a collar for his shirt around the bottom of his head shape. It's a simple V-shape that comes down from his neck. Then, draw a small, red tie right in the middle of that V. The tie is short and triangular, basically.
Below the collar, draw a straight line across his body for the top edge of his white shirt. This line usually goes across the middle of his body shape, separating his upper sponge part from his lower pants part. It's a clear division, you see.
Add two small, rectangular buttons down the center of his shirt. These are usually black or dark colored. They are lined up vertically, one below the other, just like on a real shirt, you know. This detail makes his outfit look complete, really.
Step 7: The Pants and Belt
Now, draw his brown square pants. These take up the bottom portion of his body shape, from the shirt line down to the bottom. They are pretty much a solid block of color, you know, a dark brown color.
Add a black belt around his waist, just above the pants. This is a thin, straight line that goes across his body. On the belt, draw two small, rectangular loops, one on each side, you know. These are like belt loops, but simpler.
The pants are very boxy, which fits his square shape perfectly. They should look sturdy and, you know, a bit stiff. Getting these proportions right helps make him recognizable, basically.
Arms, Legs, and Final Touches
Almost done! Now we add his thin arms and legs, and then all the little details that make Spongebob, well, Spongebob. These last steps really bring him to life, you see.
Step 8: His Bendy Arms and Hands
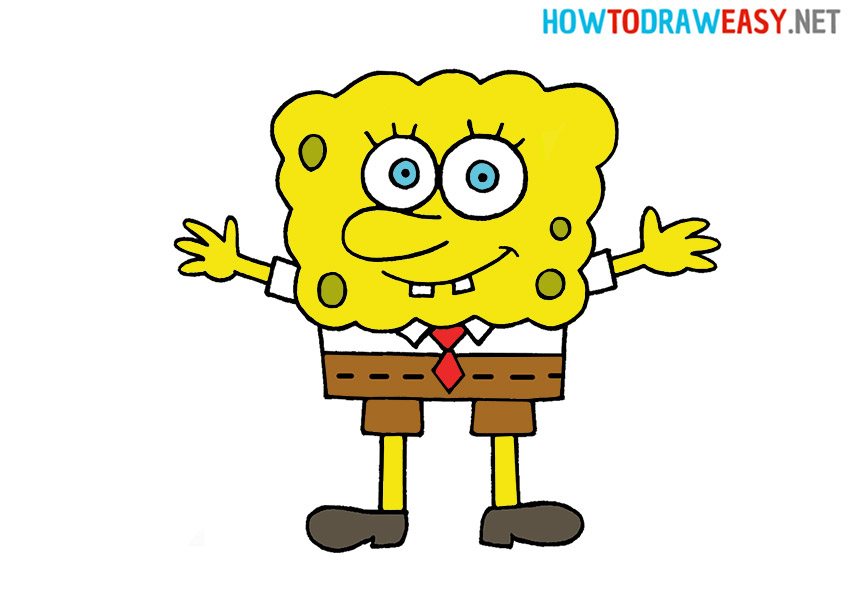
Draw two thin, wavy lines coming out from the sides of his body, just below his shirt. These are his arms. They are not perfectly straight; they have a bit of a bend or curve to them, which makes them look more lively, you know.
At the end of each arm, draw his hands. He has four fingers on each hand, and they are usually drawn in a cartoonish, somewhat rounded way. His thumbs often stick out, you know, like he's ready to grab something.
His hands are often shown wearing white cuffs, so you can add a small, rounded rectangle at the end of each arm before the fingers start. This gives him that clean, cartoon glove look, you see. Making the arms a bit bendy adds to his overall cheerful movement, basically.
Step 9: Those Thin Legs and Shoes
From the bottom of his pants, draw two more thin, wavy lines for his legs. Just like his arms, they are not straight, but have a slight curve to them. They should look like they are ready to bounce around, you know.
At the end of each leg, draw his shoes. These are black and somewhat rectangular, but with rounded toes. They look a bit like simple boots, really. Make sure they are big enough to support his body, visually speaking.
You can add a small, oval shape on top of each shoe for the laces or just a simple detail. His socks are usually visible too, as two white lines just above the shoes, basically. These small details help complete his lower half, you know.
Step 10: Adding Texture and Details
This is where Spongebob truly becomes a sponge! Draw various small, irregular circles and ovals all over his body, especially on his head and upper body. These are his pores, and they are a big part of his unique look, you know.
Don't make them too uniform; some can be larger, some smaller, and they can overlap a bit. This randomness makes him look more like a real sponge, you see. You can also add some of these small circles to his cheeks, as mentioned before.
Also, add some small, dotted lines on his arms and legs to show the texture of his skin, or just to make them look a bit less plain. These tiny details really make a difference in the final drawing, you know. They add depth and character.
Step 11: Cleaning Up and Inking
Now that all your details are in place, it's time to clean up your drawing. Take your eraser and gently erase all the light guide lines you made in the beginning. You should only be left with the main lines of your Spongebob drawing, you know.
If you want your Spongebob to have a crisp, clear outline, you can go over your pencil lines with a fine-point black pen or marker. This is called inking. Make sure your pencil lines are completely erased before you ink, as matter of fact, so they don't show through.
Take your time with the inking process. A steady hand helps make clean lines. This step makes your drawing look more finished and professional, you see. You can also use a thicker marker for the main outlines and a thinner one for smaller details, if you want.
Step 12: Coloring Your Spongebob
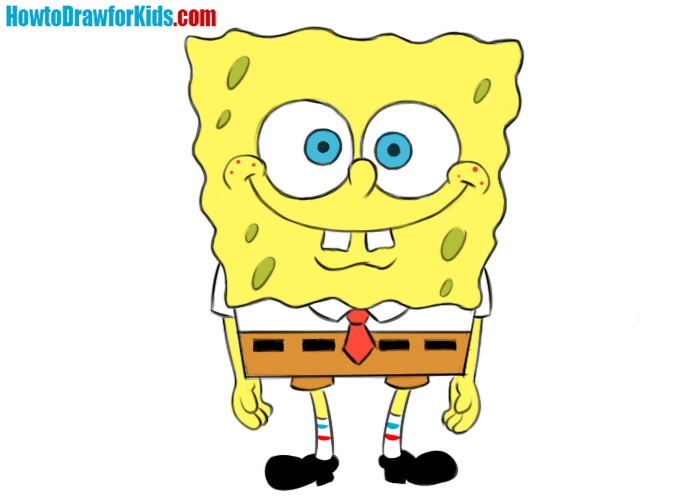
The final step is to add color! Spongebob has very specific colors that make him instantly recognizable. His body is bright yellow, his shirt is white, and his pants are brown, you know. His tie is red, and his shoes are black.
Use your crayons, colored pencils, or markers to fill in the different sections. Try to color evenly to get a smooth look. You can even add some shading if you feel like it, making certain parts a little darker to give them more depth, you see.
His eyes are blue, and his pupils are black. Remember the white sparkle in his eyes; leave that uncolored. His tongue is pink, basically. Adding color really makes your Spongebob drawing pop and brings him fully to life, you know. You can find high-quality art supplies to help with your coloring here, if you need them.
Frequently Asked Questions About Drawing Spongebob
Many people have questions when they start drawing Spongebob. Here are some common ones that come up, you know, to help you out.
Is Spongebob easy to draw for beginners?
Yes, Spongebob is actually quite easy for beginners to draw, you know. His main body shape is a simple square, and his features are made up of basic circles and lines. This makes him a great character to start with if you're just learning to draw cartoons. The step-by-step approach really helps simplify things, too.
What basic shapes make up Spongebob's body?
Spongebob's body is primarily made up of a square or a slightly wobbly rectangle, you see. His eyes are large circles, and his nose is a long, somewhat bumpy shape. His teeth are simple squares. Understanding these basic forms helps a lot when you start sketching him

Detail Author:
- Name : Gianni Skiles
- Username : sipes.arnaldo
- Email : white.devonte@mosciski.info
- Birthdate : 1977-02-02
- Address : 611 Xavier Plains West Ollieville, ME 59414
- Phone : 757.852.4735
- Company : Rodriguez, Hermann and Reinger
- Job : Lay-Out Worker
- Bio : Beatae tempora vero quisquam eum modi. Aspernatur harum ipsa aut sint nihil praesentium earum. Dicta voluptatibus doloribus voluptatem non odio. Dolorem rerum culpa corporis doloremque ut quasi sint.
Socials
instagram:
- url : https://instagram.com/karlee.zulauf
- username : karlee.zulauf
- bio : Sapiente ea nam suscipit possimus quis qui vel. Inventore eos possimus totam excepturi.
- followers : 3668
- following : 2800
tiktok:
- url : https://tiktok.com/@zulaufk
- username : zulaufk
- bio : Modi repudiandae repudiandae ab quibusdam perferendis maxime.
- followers : 3750
- following : 526
