
Have you ever looked at a beautiful palm tree and wished you could capture its relaxed, tropical vibe on paper? Learning how to draw a palm tree can seem a bit tricky at first, with all those unique fronds and textured trunks, but it's actually a very rewarding skill to pick up. For many, drawing something so iconic brings a little bit of sunshine into their day, so that's why we're here to help you get started.
This easy palm tree tutorial is perfect for young students looking to learn how to draw, and it's also great for anyone just starting their artistic journey. You see, with just a few simple shapes and lines, you can create something truly lovely. All drawing steps are included here, which make it fun and easy to follow along, honestly.
In today’s guide, we will be covering the basic elements of creating a convincing palm tree. We’ll show you how to make those signature leaves look as real as possible, and even touch on ways to make your drawing stand out. By following the simple steps, you too can easily draw a perfect palm tree, perhaps even better than you thought you could.
Table of Contents
- Getting Started with Your Palm Tree Drawing
- Crafting the Trunk of Your Palm Tree
- Making Those Signature Leaves Look Real
- Your 10 Easy Steps to a Perfect Palm Tree
- Inspiring Palm Tree Drawing Ideas
- Tips for a Great Looking Palm Tree Drawing
- Frequently Asked Questions About Palm Tree Drawing
Getting Started with Your Palm Tree Drawing
Every great drawing begins with some simple shapes, and a palm tree is no different. You might think about the overall form first, which is usually a tall, slender trunk topped with a crown of flowing leaves. This initial thought helps you place your drawing on the paper just right, you know.
Understanding the Basics
In today’s guide, we will be covering the basic elements of what makes a palm tree look like a palm tree. This means thinking about the gentle curve of the trunk and the way the leaves spread out from the top. It's almost like drawing a big, friendly umbrella, but with a lot more character. Getting these foundational lines down first really sets you up for success.
You can start by lightly sketching a slightly curved line for the trunk. It doesn't have to be perfect, just a general guide. Then, think about where the leaves will sprout from. This initial outline is your canvas, so to speak, and it helps you visualize the finished piece before you add any of the smaller details. It’s a bit like building a house; you need the frame before you put up the walls, you see.
Crafting the Trunk of Your Palm Tree
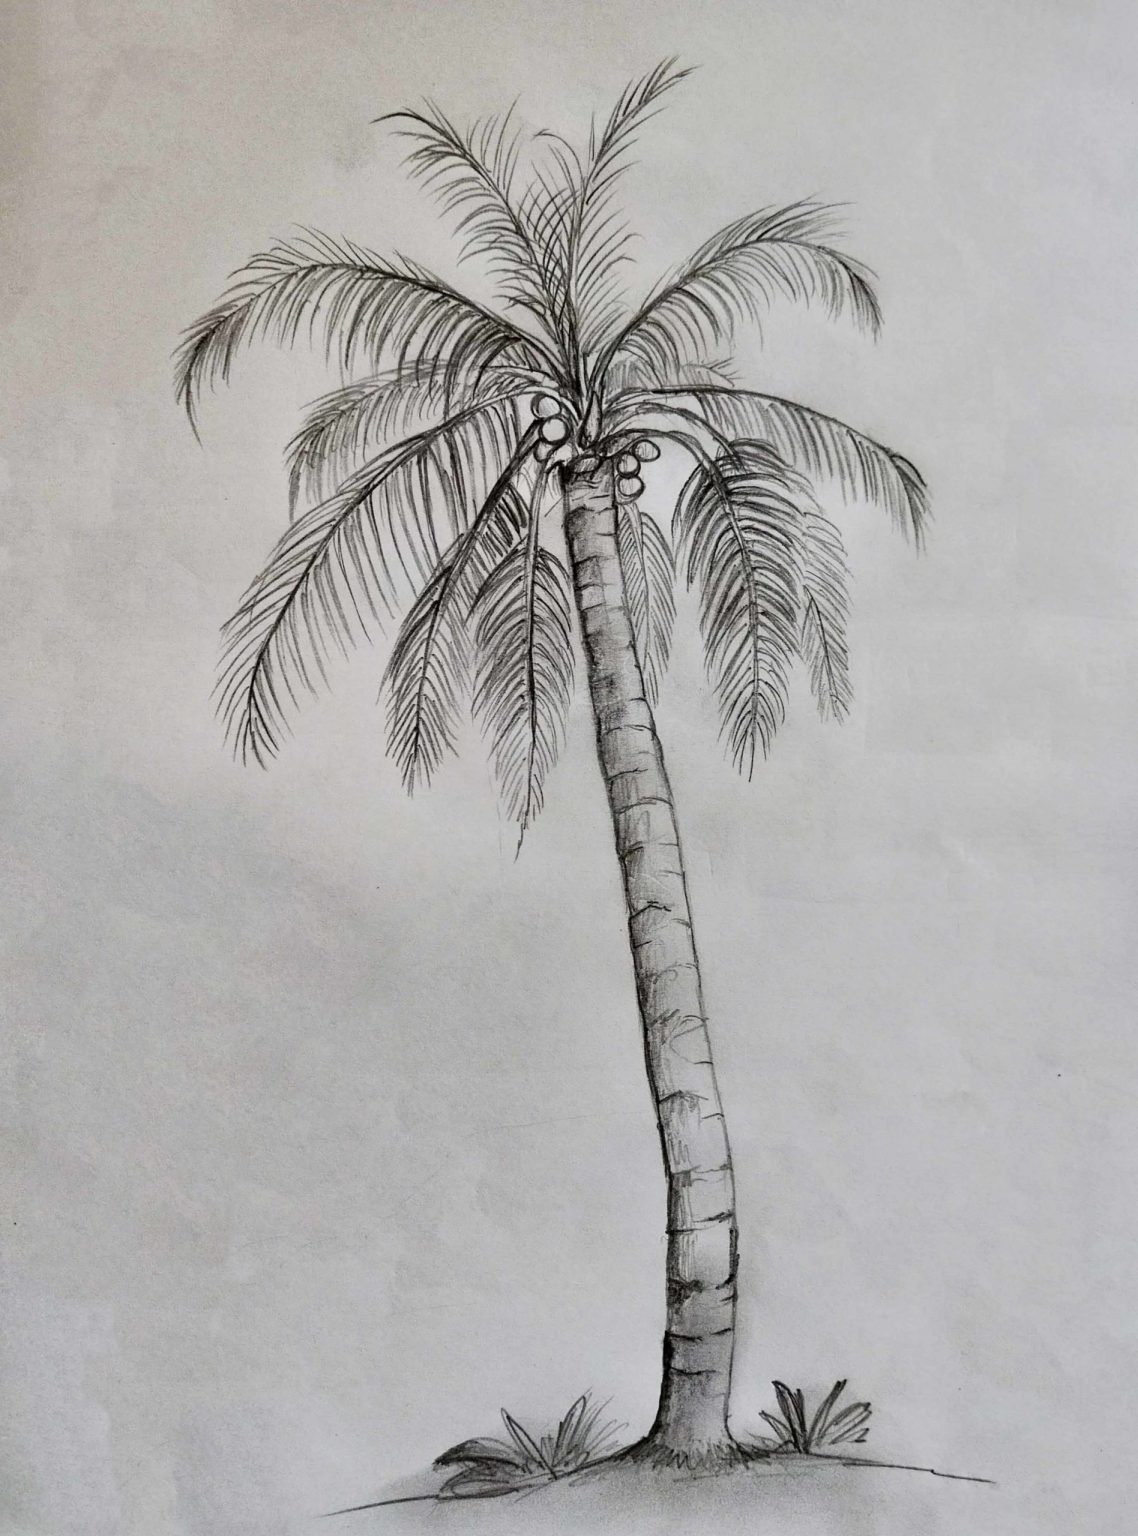
The trunk of a palm tree is perhaps its most distinctive feature, next to the leaves, of course. It’s usually not perfectly smooth; instead, it has these wonderful rings or notches that tell a story of its growth. Capturing this texture is key to making your palm tree drawing feel real and alive, and it’s surprisingly easy to do.
Adding Texture and Character
The easiest way to draw all those notches is to start with a series of inverted "V" or "U" shapes along the trunk. These don't need to be perfectly uniform; in fact, a little variation makes them look more natural. You can draw them slightly unevenly, or even have some overlap a bit, which really adds to the organic feel of the tree, you know. Think about how a real tree grows, it's never perfectly symmetrical.
Once you have the basic notches, you can add some shading to give them depth. Lightly shade beneath each notch to suggest that they are raised, creating a three-dimensional effect. This simple trick makes the trunk pop off the page. You can also add some very fine, vertical lines along the trunk to mimic the fibrous texture found on many palm varieties, which is a nice touch.
Making Those Signature Leaves Look Real
The leaves, or fronds, of a palm tree are what give it that iconic silhouette. They fan out from the top of the trunk in a beautiful, graceful way. Making them look realistic involves understanding their shape and how they droop and sway, almost like they're dancing in the breeze. This tutorial will show students how to draw a palm tree, and make those signature leaves look as real as possible.
The Secret to Frond Detail
Start by drawing the main stem of each frond, curving outwards from the top of the trunk. These stems should have a gentle arc, some pointing up, some curving down. From these main stems, you’ll draw smaller leaflets. Imagine a feather; the leaflets are like the individual strands coming off the main quill. You can draw these with quick, light strokes, almost like little blades of grass, and that really helps.
For added realism, remember that palm fronds are often split or ragged at the ends. Don't make them too neat! A few jagged edges or small gaps can make your leaves look much more authentic. Also, consider the direction of the light; shading one side of each leaflet can give your fronds a lovely sense of volume and movement. This makes a big difference, honestly.
Your 10 Easy Steps to a Perfect Palm Tree
Learning how to draw a palm tree in 10 easy steps breaks down the process into manageable chunks, making it super approachable for anyone. We'll go from the very first line to the final details, building your confidence with each stage. This step-by-step method ensures you won't miss a thing, and it's quite simple, really.
- Step 1: Sketch the Trunk Guideline. Begin with a long, slightly curved line for the main shape of your palm tree trunk. This line establishes the height and lean of your tree. It's just a guide, so keep it light.
- Step 2: Outline the Trunk. Draw a parallel line to your first guideline, making the trunk wider at the base and slightly tapering towards the top. This gives your trunk its basic form.
- Step 3: Add the Trunk Notches. Use those "U" or "V" shapes we talked about earlier to create the distinctive rings along the trunk. Vary their size and spacing a bit for a natural look.
- Step 4: Draw the Main Frond Stems. From the very top of the trunk, draw several curved lines radiating outwards. These will be the central veins for your palm fronds. Think of them like spokes on a wheel, but curving.
- Step 5: Form the Frond Shapes. Around each main frond stem, sketch the overall shape of the leaf. They should be wide near the trunk and narrow towards the tip, almost like a long, slender feather.
- Step 6: Add Leaflets to the Fronds. Within each frond shape, draw many small, short lines extending from the main stem outwards. These are the individual leaflets. Make them a bit irregular for realism.
- Step 7: Refine Leaflet Edges. Go back and add some jagged or torn edges to a few of the leaflets. This makes them look more natural and less perfect, just like real palm leaves.
- Step 8: Detail the Trunk Texture. Add subtle vertical lines and a bit of shading to the trunk notches to give them depth and a rough texture. This makes the trunk look solid.
- Step 9: Add Shading for Depth. Choose a light source and add soft shading to one side of the trunk and under the fronds. This creates a sense of volume and makes your palm tree look three-dimensional.
- Step 10: Final Touches. Erase any stray guidelines and refine any areas that need it. You can add a few falling coconuts if you like, or even some small details at the base of the tree. This is where your drawing really comes to life, you know.
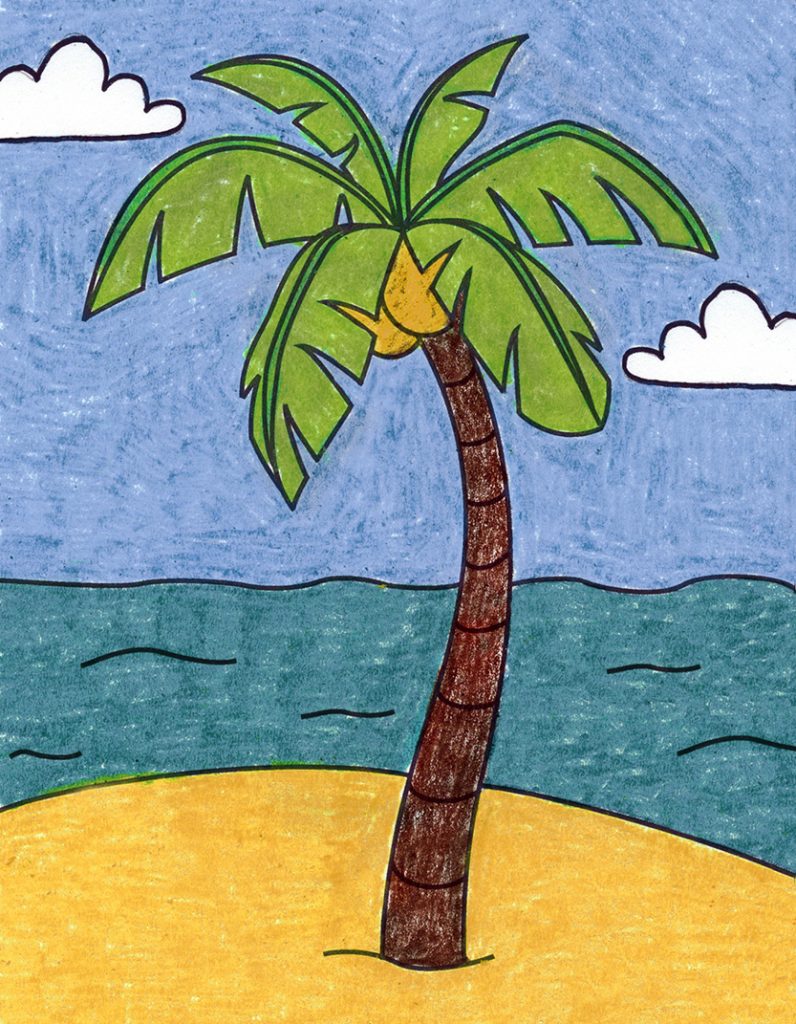
Inspiring Palm Tree Drawing Ideas
Once you've got the hang of drawing a basic palm tree, a whole world of creative possibilities opens up. You can try different styles, experiment with backgrounds like sunsets or islands, or even add other elements to create a complete scene. In this post, we’ll share 25 easy and enjoyable palm tree drawing ideas to inspire your artwork, which is quite a lot, actually.
Experimenting with Backgrounds
A palm tree often brings to mind a sunny beach or a warm, tropical evening. Adding a background can dramatically change the mood of your drawing. Imagine a vibrant sunset behind your palm tree, with oranges, pinks, and purples bleeding into the sky. This is where you can really play with color and light, you know. Or, picture your palm tree silhouetted against a full moon, which creates a very different, somewhat mysterious feel.
You can also place your palm tree on a small island, perhaps with gentle waves lapping at the shore. Adding a few clouds in the sky or some distant mountains can give your drawing more depth and a sense of place. These backgrounds aren't just filler; they tell a story about your palm tree, which is pretty cool.
Different Styles and Settings
Beyond realistic depictions, palm trees can be drawn in many artistic styles. You could try a cartoonish palm tree, with exaggerated features and bright colors, which is a lot of fun. Or, perhaps a minimalist approach, using just a few clean lines to suggest the form, which can be very striking. Some people even like to draw them in a more abstract way, focusing on patterns and shapes rather than strict realism, and that's totally fine.
Consider drawing a lone palm tree standing tall against an open sky, or a cluster of palms swaying together. You could even draw a palm tree from a worm's-eye view, looking up at its towering height, which creates a dramatic perspective. Think about adding other elements like a hammock, a beach umbrella, or even some tropical birds perched in the fronds. These additions make your scene feel more complete, you know.
Tips for a Great Looking Palm Tree Drawing
To really make your palm tree drawing shine, there are a few extra tips you can keep in mind. These small details can elevate your artwork from good to great, giving it that professional touch. It's often the little things that make the biggest difference, honestly.
One important aspect is to vary the thickness of your lines. Use slightly thicker lines for the parts of the tree that are closer to you or that you want to emphasize, and thinner lines for details or parts that recede. This creates visual interest and depth. Also, don't be afraid to use an eraser! Drawing is an iterative process, and correcting mistakes or refining shapes is a normal part of it. You can learn more about drawing techniques on our site, which is helpful.
Experiment with different drawing tools too. A pencil is great for sketching, but you might try pens for bolder outlines, or even markers and colored pencils to add color. Each tool brings a different quality to your drawing. Remember, practice is key. The more you draw palm trees, the better you’ll get at capturing their unique beauty. You can find more drawing inspiration here, too.
Frequently Asked Questions About Palm Tree Drawing
People often have a few common questions when they're learning to draw palm trees. Here are some answers to help you along your artistic path.
How do I make the palm tree leaves look flowy and natural?
To get that flowy look, focus on the curve of the main frond stems. They should arc gently, almost like a graceful wave. Then, when you draw the individual leaflets, make them slightly irregular in length and angle. Don't draw them as perfectly straight lines; a little wobble makes them look more organic and wind-swept, which is pretty cool.
What's the easiest way to draw the texture on the trunk?
The easiest way to draw all those notches is to start with a series of inverted "V" or "U" shapes stacked up the trunk. Once you have those basic shapes, add a little bit of shading underneath each one to give them a raised, three-dimensional appearance. You can also add very faint vertical lines to suggest the rough, fibrous surface of the bark, you know.
Can I draw different types of palm trees?
Absolutely! There are many types of palm trees, each with slightly different trunk shapes and leaf arrangements. Some have very straight trunks, while others are quite slender. Their leaves can be fan-shaped or feather-like. Once you master the basic palm tree drawing, you can observe pictures of different palm varieties and adapt your technique. It’s a fun way to expand your drawing skills, honestly.

Detail Author:
- Name : Kara Gerlach MD
- Username : jerel47
- Email : cynthia.haley@gmail.com
- Birthdate : 1999-04-27
- Address : 9599 Alejandra Rest Kylastad, MI 73628-2817
- Phone : 1-225-817-8459
- Company : Murazik, Schroeder and Corkery
- Job : Lifeguard
- Bio : Velit corporis accusamus laborum temporibus iusto repudiandae qui. Totam perspiciatis et quidem voluptatibus culpa blanditiis sapiente. Officia tempore et et. Nulla velit aliquid soluta voluptas.
Socials
linkedin:
- url : https://linkedin.com/in/danial_real
- username : danial_real
- bio : Laborum non est aut a tenetur iure itaque.
- followers : 3079
- following : 1130
tiktok:
- url : https://tiktok.com/@danial_id
- username : danial_id
- bio : Neque aliquid illum commodi ut aut quis.
- followers : 3988
- following : 1730
twitter:
- url : https://twitter.com/danial_xx
- username : danial_xx
- bio : Corrupti quasi quia nihil quisquam. Ut deserunt consectetur eius aspernatur mollitia modi consequatur.
- followers : 2421
- following : 386
instagram:
- url : https://instagram.com/yundtd
- username : yundtd
- bio : Ducimus fugiat et sapiente illum. Explicabo vero impedit aliquid ullam.
- followers : 6242
- following : 1676
facebook:
- url : https://facebook.com/danial.yundt
- username : danial.yundt
- bio : Accusantium delectus vero et.
- followers : 5244
- following : 39
