
Keeping your kitchen tidy, especially the cooking area, is something many people care about a lot. A clean stove top, you know, just makes the whole space feel so much better. The meaning of clean, as some experts point out, is being free from dirt or any unwanted marks. It means your stove top is clear of spills, grease, or food bits that collect when you cook. This kind of cleanliness helps create a space that feels hygienic and neat, which is something everyone likes to have in their home, actually.
You might find yourself looking at a stove top covered in cooked-on messes, maybe some splatters from dinner last night, or perhaps some older, stubborn spots. It's a common issue for anyone who cooks regularly, and it can sometimes seem like a big job to get it truly clean. Those greasy films and burnt-on bits can really stick, making your kitchen look a bit less inviting than you'd like it to.
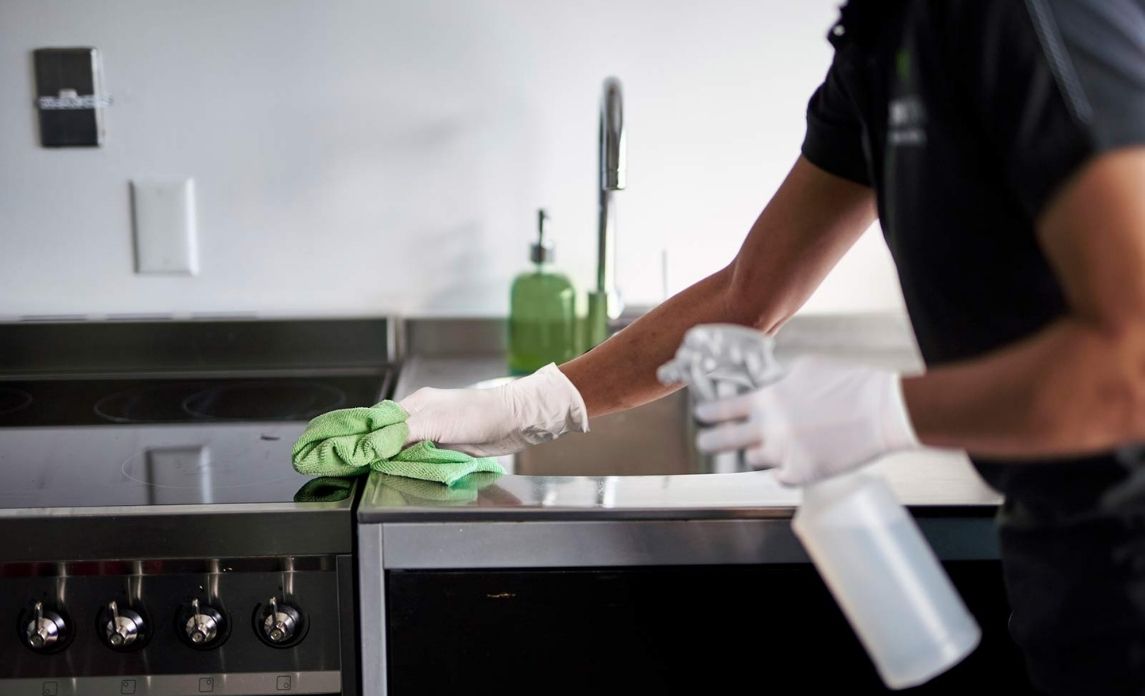
This guide is here to help you get your stove top sparkling again, no matter what kind you have. We will go through the steps, talk about the right things to use, and give you some easy ways to deal with even the most difficult messes. So, in a way, you can keep your cooking area looking good every single day, which is rather nice.
Table of Contents
- Why a Clean Stove Top Matters
- Getting Ready: What You'll Need
- Cleaning Different Stove Top Types
- Tackling Tough Stains
- Natural Cleaning Solutions
- Everyday Habits for a Tidy Stove
- Frequently Asked Questions About Stove Top Cleaning
- Keeping Your Stove Top Looking Great
Why a Clean Stove Top Matters
Having a clean stove top is about more than just how your kitchen looks, you know. A stove top that is free from dirt, stains, or any kind of unwanted stuff makes your whole cooking area a lot more pleasant. It suggests a state of hygiene and orderliness, which can make cooking feel much better. When your stove is clean, it is also safer because old food bits or grease can sometimes cause problems, or even attract little pests, which is something nobody wants.
Regular cleaning can also help your stove last longer. Food that burns onto the surface or grease that builds up can, in a way, damage the materials over time. Keeping things clean means you are taking care of your appliances, which saves you money in the long run. Plus, cooking on a surface that is truly free from dirt just feels better, doesn't it?
Getting Ready: What You'll Need
Before you start any cleaning project, it is a good idea to gather all your supplies. This makes the job go more smoothly and helps you stay focused. You want to have everything ready so you do not have to stop halfway through to find something, which can be a bit annoying.
Basic Supplies
For most stove top cleaning tasks, you will need a few simple things. These are items you probably already have around your house, or they are easy to get. Having these on hand makes regular upkeep pretty straightforward, actually.
- Warm water: This is pretty much always needed for cleaning.
- Dish soap: A gentle soap that helps cut through grease.
- Soft cloths or sponges: These help wipe surfaces without scratching.
- Paper towels: Good for drying and for quick cleanups.
- Microfiber cloths: These are good for streak-free drying.
- Baking soda: A natural cleaner that helps lift stains.
- White vinegar: Another natural option, good for shine and cutting grease.
Specialized Tools
Sometimes, for tougher jobs or specific stove types, you might need a few extra items. These are not always necessary, but they can really help when you are dealing with a more stubborn mess. They can make a big difference, you know.
- Plastic scraper or razor blade (for glass tops): Use this very carefully to lift dried-on bits.
- Stove top cleaner specifically for glass/ceramic: These products are made to be gentle on delicate surfaces.
- Non-abrasive scrubbing pad: For tougher spots that need a little more effort.
- Old toothbrush: Great for getting into small cracks and corners, where dirt often hides.
- Rubber gloves: To protect your hands from cleaning solutions.
Cleaning Different Stove Top Types
Every stove top is a bit different, and what works well for one might not be the best for another. Knowing your stove type helps you pick the right way to clean it. It also helps you avoid causing any damage, which is pretty important.
Electric Coil Stove Tops
These stoves have those metal coils that heat up. They are pretty common and can get quite messy around the burners. Cleaning them takes a little bit of care, especially with the coils themselves. So, you want to be gentle.
- Cool Down and Unplug: First, make sure your stove is completely cool. Then, unplug it from the wall. This is a very important safety step.
- Remove Coils and Drip Pans: Lift out the burner coils. They usually just pull straight up. Underneath, you will find drip pans. Take those out too.
- Clean Drip Pans: For the drip pans, you can soak them in hot, soapy water. If they have a lot of cooked-on food, sprinkle them with baking soda first, then pour some vinegar over them. Let them sit for about 15-20 minutes. This helps loosen the grime. After soaking, scrub them with a sponge or a non-abrasive pad. You might need to use a little elbow grease for really stuck-on bits.
- Wipe Down the Surface: Use a damp cloth with some dish soap to wipe down the metal surface under the coils. Get rid of any crumbs or spills.
- Clean Coils (Carefully): The coils themselves should not be put in water. If they are dirty, you can wipe them with a damp cloth. For really sticky spots, you might gently scrape them with a plastic scraper. Be very careful not to get the electrical connections wet.
- Put Everything Back: Once everything is clean and dry, put the drip pans back in place, then the coils. Plug your stove back in.
Gas Stove Tops
Gas stoves have grates and burner caps that can collect a lot of grease and food. They are pretty sturdy, but the grates can be heavy and sometimes tricky to clean. This process usually involves soaking, which is rather effective.
- Cool Down: Make sure all the burners are off and the stove is cool to the touch. Safety first, always.
- Remove Grates and Burner Caps: Lift off the grates. These are the metal pieces that pots sit on. Then, take off the burner caps, which cover the flame ports.
- Soak Grates and Caps: Fill your sink with hot, soapy water. Put the grates and burner caps into the water. For really greasy or burnt-on items, you can add a cup of white vinegar or a few spoonfuls of baking soda to the water. Let them soak for at least 30 minutes, or even longer for very tough messes. Some people leave them overnight.
- Clean the Stove Top Surface: While the grates are soaking, wipe down the stove top surface. Use a cloth with warm, soapy water. For sticky spills, a sprinkle of baking soda directly on the spot, followed by a little water to make a paste, can help. Let it sit for a few minutes, then scrub gently.
- Scrub Grates and Caps: After soaking, use a brush or scrubbing pad to clean the grates and caps. The grime should come off much more easily. Rinse them well under running water.
- Dry and Reassemble: Make sure all parts are completely dry before putting them back on the stove. This is important to prevent rust and ensure proper function.
Glass or Ceramic Stove Tops
These smooth surfaces look very sleek, but they can scratch easily and show every little smudge. Cleaning them needs a gentle touch and the right products to keep them looking shiny. So, you want to be careful with these.
- Cool Down: Always let the stove top cool completely before you start cleaning. Cleaning a hot surface can cause damage.
- Wipe Away Loose Debris: Use a soft, damp cloth to wipe away any crumbs or loose food bits.
- Apply Specialized Cleaner: Squirt a generous amount of a glass or ceramic stove top cleaner onto the surface. These cleaners are designed to be non-abrasive.
- Let It Sit: Let the cleaner sit on the stove top for a few minutes, perhaps five to ten, to let it work on any cooked-on food.
- Scrub Gently: Use a non-abrasive scrubbing pad or a soft cloth to gently scrub the surface. For very stubborn, burnt-on spots, you might need a plastic scraper or a razor blade held at a very low angle (almost flat) to carefully lift the hardened food. Be very gentle to avoid scratching.
- Wipe Clean: Use a clean, damp cloth to wipe away the cleaner and loosened grime. Rinse your cloth often.
- Buff for Shine: Finish by buffing the surface with a dry microfiber cloth to get a streak-free shine. This makes it look really good, you know.
Induction Stove Tops
Induction stove tops are very similar in appearance to glass or ceramic ones, but they heat differently. They are generally easier to clean because food does not burn onto the surface as much, since the surface itself does not get as hot. Still, spills happen.
- Cool Down: Even though the surface does not get as hot, it is still a good idea to let it cool down before cleaning.
- Wipe Immediately: For best results, wipe up spills as soon as they happen, once the surface is cool enough to touch.
- Use Mild Soap and Water: For everyday cleaning, a soft cloth with warm water and a little dish soap is usually enough. Wipe the surface gently.
- For Stubborn Spots: If there are any sticky or dried-on spills, you can use a small amount of baking soda paste (baking soda mixed with a little water). Apply it to the spot, let it sit for a few minutes, then gently rub with a soft cloth.
- Scrape if Needed: Like glass tops, you can use a plastic scraper for very tough, hardened spills, but always with extreme care.
- Rinse and Dry: Wipe the surface with a clean, damp cloth to remove any soap or residue, then dry it with a clean microfiber cloth for a streak-free finish.
Tackling Tough Stains
Sometimes, despite your best efforts, you end up with stains that just will not go away with a simple wipe. These can be pretty frustrating, you know. But with a little extra effort and the right approach, even the most stubborn marks can often be removed.
Burnt-On Food
Burnt-on food is a common problem, and it can seem like it is fused to the stove top. The key here is to soften it up before trying to scrape it away. This makes the job much easier, and less likely to cause damage.
- Make a Baking Soda Paste: Mix baking soda with a small amount of water to create a thick paste. It should be like toothpaste.
- Apply to the Stain: Spread a good layer of this paste over the burnt-on food. Make sure the stain is completely covered.
- Let It Sit: This is the most important part. Let the paste sit on the stain for at least 15-30 minutes. For very old or very tough burns, you might let it sit for a few hours, or even overnight. This gives the baking soda time to break down the food.
- Dampen a Towel: Get a towel or cloth wet with warm water and wring it out so it is just damp. Lay this damp towel over the baking soda paste. This helps keep the paste moist and active.
- Scrub Gently: After the waiting period, remove the towel. Use a non-abrasive scrubbing pad or a soft sponge to gently scrub the stain. The burnt food should start to loosen and come off.
- Scrape (if necessary): For really stubborn bits, especially on glass tops, you might very carefully use a plastic scraper or a razor blade at a very low angle to lift the softened food.
- Wipe Clean: Wipe away all the paste and grime with a clean, damp cloth. Rinse and repeat until the surface is clean.
Grease Buildup
Grease can spread everywhere and create a sticky, grimy layer. It is a very common kitchen mess. The good news is that grease usually responds well to things that cut through oil, like dish soap or vinegar. So, it is often not too hard to get rid of.
- Use Dish Soap and Hot Water: For general grease, mix a few drops of dish soap into a bowl of hot water. Dip a soft cloth into this solution and wipe down the greasy areas. The hot water helps loosen the grease, and the soap breaks it down.
- Apply Vinegar Spray: For a more powerful grease cutter, fill a spray bottle with undiluted white vinegar. Spray it generously over the greasy areas.
- Let It Sit: Let the vinegar sit for about 5-10 minutes. This gives it time to work on the grease.
- Wipe and Rinse: Wipe the surface with a clean, damp cloth. You should see the grease coming off. Rinse your cloth often and keep wiping until all the grease is gone.
- Baking Soda for Extra Power: For very thick grease, you can sprinkle baking soda directly onto the greasy spots, then spray with vinegar. The fizzing reaction helps lift the grease. Let it sit for a bit, then scrub gently with a damp sponge.
- Dry Thoroughly: Always dry the surface completely with a clean, dry cloth to prevent streaks and water spots.
Natural Cleaning Solutions
Using natural ingredients like baking soda and vinegar is a great way to clean your stove top without harsh chemicals. These options are generally safe for your home and the environment, and they work very well for many common messes. It is a good choice for those who prefer a more natural approach, you know.
Baking soda is a mild abrasive that can scrub away grime without scratching. It also helps to absorb odors. White vinegar, on the other hand, is an acid that cuts through grease and helps to disinfect. When used together, they create a powerful cleaning duo that can tackle a lot of kitchen messes. You can learn more about natural cleaning methods on other sites, for example.
Everyday Habits for a Tidy Stove
Keeping your stove top clean does not have to be a big, once-a-month project. Little actions every day can make a huge difference, actually. These small habits prevent messes from building up, which means less hard work later on. It is a lot easier to wipe a fresh spill than a dried-on one, you know.
- Wipe Spills Right Away: As soon as a spill happens and the stove is cool enough, wipe it up. This stops food from drying and sticking.
- Quick Wipe After Cooking: After you finish cooking and the stove has cooled down, give it a quick wipe with a damp cloth. This gets rid of any little splatters you might not have noticed.
- Use Lids: Cooking with lids on your pots and pans helps contain splatters, keeping them inside the pot instead of on your stove top.
- Clean Drip Pans Regularly: If you have an electric coil stove, clean the drip pans often. They catch a lot of the mess.
- Deep Clean Periodically: Even with daily wiping, a deeper clean every week or two will keep your stove in great shape. This gets rid of any hidden grime.
Frequently Asked Questions About Stove Top Cleaning
People often have similar questions when it comes to keeping their stove tops clean. Here are some common things people ask, along with some helpful answers. These are things that many people wonder about, you know.
Can I use steel wool on my stove top?
No, you should not use steel wool on most stove tops. Steel wool is very abrasive and can scratch surfaces, especially glass, ceramic, or stainless steel. For tougher spots, it is better to use a non-abrasive scrubbing pad or a plastic scraper with a gentle touch. This helps keep your stove looking good, which is important.
How often should I clean my stove top?
For best results, wipe your stove top down after every use, once it has cooled. This handles fresh spills. A more thorough clean, where you remove grates or coils, is good to do weekly or bi-weekly, depending on how much you cook. This regular care really makes a difference, actually.
What if I have really old, baked-on stains?
For very old, baked-on stains, patience is key. You might need to apply a baking soda paste and let it sit for several hours, or even overnight, covered with a damp cloth. This long soaking time helps soften the grime. You may need to repeat the process a few times. Sometimes, a specialized stove top cleaner designed for heavy-duty messes can also help, so, you know, try that too.
Keeping Your Stove Top Looking Great
A clean stove top is a sign of a well-cared-for kitchen. By following these simple steps and making cleaning a regular part of your routine, you can keep your cooking area looking spotless and ready for your next meal. Remember, something that is clean is free from dirt or unwanted marks, and it suggests a state of hygiene and neatness, just like our cleaning experts talk about. You can learn more about home organization on our site, and link to this page for more kitchen cleaning tips.


Detail Author:
- Name : Dr. Waldo Johnston I
- Username : eriberto.sanford
- Email : cassin.myles@gmail.com
- Birthdate : 1970-05-17
- Address : 5937 Farrell Tunnel Suite 241 East Cathrinestad, ME 86050-3460
- Phone : 820.871.2217
- Company : Fritsch, Lehner and Cormier
- Job : Graduate Teaching Assistant
- Bio : Dolor tempore animi esse est dolorem quaerat voluptate. Veniam ratione deserunt quo id. Adipisci laudantium et similique ut ut ipsum. Modi architecto eos non a sunt rem magni.
Socials
facebook:
- url : https://facebook.com/ledner1995
- username : ledner1995
- bio : Ut quo qui facilis voluptatem.
- followers : 4738
- following : 328
instagram:
- url : https://instagram.com/lednerr
- username : lednerr
- bio : Sed at dicta natus sit cupiditate quos. Eos cupiditate est rem omnis aperiam rerum.
- followers : 1267
- following : 1258
tiktok:
- url : https://tiktok.com/@roxane.ledner
- username : roxane.ledner
- bio : Repudiandae illo nihil perspiciatis incidunt sunt consectetur perspiciatis.
- followers : 141
- following : 324
