
Learning how to fade hair at home can seem, well, a little tricky, can't it? Many folks feel a bit lost when they think about trying to create that smooth, gradual hair length change themselves. But honestly, getting that neat, polished appearance with a fade haircut is totally within reach, even if you’ve never picked up a clipper before. This popular hair style, with its longer hair on top and neatly trimmed sides and back, really does offer a very flattering look for just about anyone, so it's worth learning how to do it yourself, you know?
We’re going to walk you through the whole process, from getting your tools ready to making sure those layer lines are super clean. You'll get some really helpful insights from professional hair stylists and even a few bonus tips from Teresa Fulcher, who is a licensed cosmetologist and our own fade specialist. So, if you're keen to achieve a sharp appearance without a trip to the salon, you're definitely in the right place.
This guide is put together to give you all the steps, along with some great advice, for achieving a clean, professional-looking fade right where you are. Whether you’re just starting out or simply want to get better at your haircutting skills, we've got you covered. You’ll discover the different fade styles, the bits and pieces you’ll need, and some truly expert ways to get that perfect result, which is pretty cool, isn't it?
Table of Contents
- Understanding the Fade Haircut
- Getting Ready: Essential Tools for Your Fade
- Prepping for the Cut: Hair and Clippers
- The Art of the Fade: Your Step-by-Step Guide
- Expert Tips for a Perfect Home Fade
- Common Mistakes to Avoid When Fading Hair
- Frequently Asked Questions About Fading Hair
- Wrapping Things Up
Understanding the Fade Haircut
The fade haircut is, you know, a really well-liked style that makes someone's hair quite long and full up near the top. Then, it gradually gets shorter and neater as it goes down towards the bottom of the head. This creates a very smooth, almost seamless transition in hair length, which is pretty much its defining characteristic. It’s a clean look, and it tends to be quite adaptable for many different hair types and face shapes, which is a big part of why it's so popular, actually.
What Makes a Fade So Popular?
Well, a fade haircut just looks incredibly sharp, doesn't it? It offers a modern and tidy appearance that can be dressed up or down, sort of. People often choose it because it keeps the hair off the neck and ears, which is nice, while still allowing for plenty of styling options on the longer top part. It's a versatile choice, really, that can be adapted to suit personal taste, which is a big plus.
Different Fade Styles to Consider
There are quite a few kinds of fades, so you can pick one that truly suits you. You have the low fade, where the shortest part stays very low on the head, just above the ears. Then there's the mid fade, which starts a bit higher, around the temples, offering a more noticeable transition. And, of course, the high fade, which begins quite high on the head, creating a very dramatic and bold contrast, you know? Each type gives a slightly different feel, so it’s good to think about what kind of look you’re aiming for.
Getting Ready: Essential Tools for Your Fade
Before you even think about starting to cut, you really need to gather all your bits and pieces. Having the right tools makes a huge difference in how easy and successful your fade will be. You don't want to be halfway through and realize you're missing something important, do you? It's like baking a cake without all the ingredients, sort of.
Here’s what you’ll typically need, so you can be fully prepared:
- Good Quality Clippers: These are, you know, the most important tool. Look for a pair that feels comfortable in your hand and has a strong motor. Professional hair stylists often mention how much a good set of clippers can improve your work.
- Clipper Guards: These plastic attachments come in various sizes and help you control the length of the hair you're cutting. You'll need a range of them to create that smooth fade effect, from very short to longer ones, obviously.
- Trimmers or Edgers: These are smaller and more precise than regular clippers. They're perfect for cleaning up necklines, around the ears, and creating sharp outlines, which is very helpful for that crisp finish.
- Hair Comb: A fine-toothed comb is essential for sectioning hair, lifting it away from the scalp, and guiding your clippers. It helps you keep everything tidy as you work, which is pretty important.
- Hand Mirror: If you’re doing this on yourself, a second mirror will help you see the back of your head. It’s pretty hard to get an even cut without one, honestly.
- Hair Clips: These are useful for holding longer hair out of the way, especially the hair on top of the head, while you work on the sides and back. It just keeps things neat and organized, you know?
- Cleaning Brush and Clipper Oil: Keeping your clippers clean and oiled is super important for their performance and lifespan. A little maintenance goes a long way, so it's worth doing, really.
- Barber Cape or Old Towel: This will protect your clothes from stray hairs. You don't want hair all over your favorite shirt, do you?
Having all these items ready before you start will make the whole process much smoother and less stressful. It's like having all your ducks in a row, sort of.
Prepping for the Cut: Hair and Clippers
Before you even touch the clippers to hair, there are a couple of really important things to do. Proper preparation, honestly, sets you up for success. You want the hair to be in the best possible condition for cutting, and your tools to be ready to go, too. It’s a bit like getting your canvas ready before you paint, you know?
First off, make sure the hair is clean and dry. While some barbers might cut wet hair for certain styles, for a fade, especially for beginners, dry hair is usually much easier to work with. It shows its true length and how it falls naturally, which is very helpful for seeing your progress. If the hair is dirty or oily, the clippers might snag, which is not what you want, obviously.
Next, it’s about your clippers. You need to make sure they are clean and well-oiled. Take a moment to brush away any old hair from the blades and then apply a drop or two of clipper oil. Run the clippers for a few seconds to let the oil spread. This keeps the blades moving smoothly and helps prevent them from getting too hot, which is pretty important for a good cut, you know?
Also, check your clipper guards. Make sure they are all there and that they attach securely to your clippers. You'll be switching them out quite a bit, so you want them to be easy to put on and take off without any fuss. A licensed cosmetologist, Teresa Fulcher, often stresses the importance of having your tools in top shape before you begin. It really does make a difference, apparently.
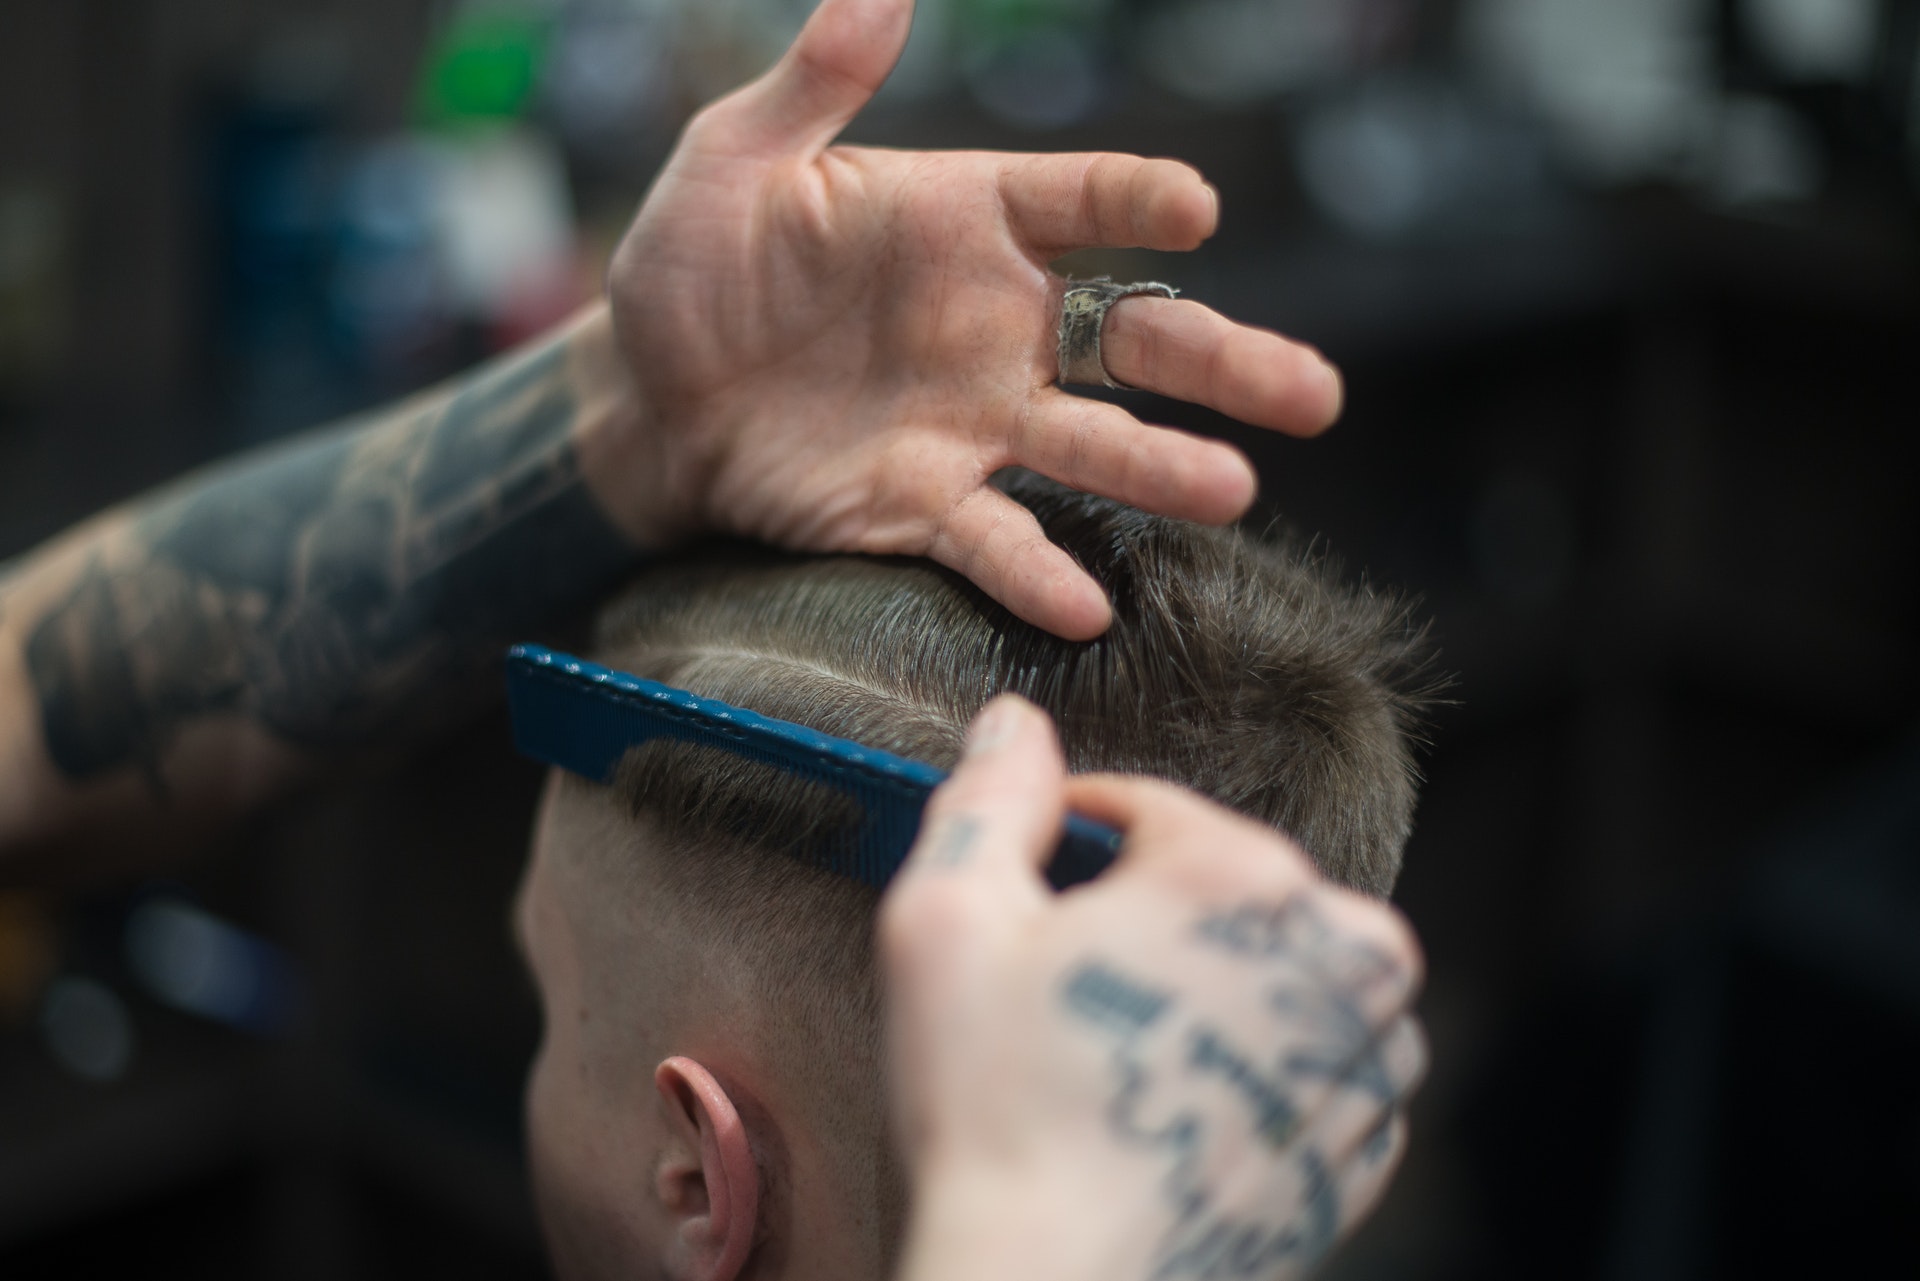
The Art of the Fade: Your Step-by-Step Guide
Alright, so this is where the magic happens, so to speak. Creating a fade is all about building up layers of different lengths, gradually, to get that smooth look. It might seem a bit much at first, but if you take it step by step, it's really quite manageable. Just go slow and be patient with yourself, you know? You're learning a new skill, after all.
Setting Your First Guideline
This is your starting point, the very shortest part of your fade. Pick your smallest clipper guard, usually a #0 or #1, or even no guard at all for a skin fade. Decide how high you want this shortest section to go. For a low fade, it’ll be just above the ear. For a mid fade, it’s a bit higher, around the temple. For a high fade, it goes up pretty far on the head, almost to the crown. With the clippers, make a clean, even line all the way around the head at your chosen height. This is your first guide, and it's very important to get it right, as it sets the foundation, you know?
Moving Up: Creating Your Next Sections
Now, switch to the next largest clipper guard, so if you used a #0, go to a #1. Cut a new section directly above your first guideline, but only go up about half an inch to an inch. You're creating another line, a bit longer than the first. The trick here is to use a "scooping" motion, pulling the clippers away from the head as you reach the top of this new section. This helps to soften the line you're creating and makes blending easier later on, which is quite clever, really. Repeat this process, moving up in guard sizes (e.g., #1 to #2, #2 to #3), creating distinct, slightly longer sections each time. Keep your lines even all the way around, which is pretty crucial, actually.
Blending the Lines for a Smooth Transition
This is often the part that confuses people the most, but it’s really about softening those visible lines you just created. Go back to the smaller guard you used for the lower line of a section. For example, if you cut with a #1 and then a #2, you'd go back to the #1. Now, instead of cutting straight up, you'll use a very slight scooping motion, just barely skimming the hair at the line where the two lengths meet. You're trying to remove the weight from that line, making the transition less harsh. You can also use the "clipper over comb" technique here, which is where you hold the comb flat against the head, lift a small section of hair, and then cut against the comb with your clippers. This is a bit more advanced but incredibly effective for blending, so it's worth practicing, you know?
Professional hair stylists often use the lever on their clippers for even finer blending. Opening the lever slightly makes the cut a tiny bit longer, and closing it makes it shorter. This allows for really precise adjustments to smooth out any stubborn lines, which is very handy, honestly. You can go back and forth between guard sizes and lever positions, working those lines until they disappear, more or less. It takes a bit of patience, but it's very rewarding when you see that smooth blend, you know?
Cleaning Up and the Finishing Touches
Once you’re happy with your blend, it’s time for the final details. Use your trimmers or edgers to create a super crisp outline around the ears and the back of the neck. This really makes the fade pop and gives it that professional, finished look. Be careful here, as these tools are very sharp. You can also use your comb and scissors to trim any longer hair on top to your desired length and style it, which is pretty much the last step. Step back and check your work from all angles using your hand mirror. Look for any uneven spots or missed hairs and tidy them up. A quick brush to remove loose hairs, and you're pretty much done, which is great, isn't it?
Expert Tips for a Perfect Home Fade
Getting a really good fade at home takes a bit of practice, but these insights from pros can really help you get there faster. Teresa Fulcher, our licensed cosmetologist, has some excellent pointers that can make a big difference, honestly. It’s like having a secret weapon, sort of.
- Start Longer, Go Shorter: Always begin with a longer guard than you think you need. You can always take more hair off, but you can’t put it back on, you know? This saves you from making big mistakes early on, which is very helpful.
- Use Good Lighting: Natural light is best, but if that’s not an option, make sure you have bright, even lighting around your head. Shadows can hide lines and uneven spots, making it harder to get a smooth blend, which is pretty frustrating, actually.
- Keep Your Clipper Blades Clean: As you cut, hair can build up in the blades, making them less effective. Brush them out often, and re-oil if they start to feel sluggish. This keeps your cuts sharp and smooth, which is important.
- Practice Your Scooping Motion: That little flick of the wrist as you pull the clippers away from the head is key for blending. It helps prevent harsh lines and creates that soft transition. It takes a bit of getting used to, but it’s worth practicing, you know?
- Use the Mirror: Constantly check your work in the mirror, and use a hand mirror for the back. Seeing your progress from different angles helps you spot uneven areas before they become a problem, which is pretty smart.
- Take Your Time: Don’t rush the process. Fading hair is a detailed job, and patience is your friend. Rushing often leads to mistakes that are hard to fix, which is something you want to avoid, obviously.
- Consider Hair Texture: Different hair types behave differently. Thicker, coarser hair might show lines more easily, while finer hair might blend more readily. Adjust your technique slightly based on the hair you're working with, which is something to keep in mind, really.
- Listen to Your Clippers: If they sound like they're struggling, they might need cleaning, oiling, or sharpening. Well-maintained clippers work better and last longer, which is pretty much a given.
- Learn more about hair care and styling on our site for additional tips and tricks, which is pretty useful, honestly.
These tips, you know, really help to refine your technique and get you closer to that professional-looking fade. It’s all about attention to detail and a little bit of patience, really.
Common Mistakes to Avoid When Fading Hair
Even with the best intentions, it's easy to make a few slip-ups when you're learning how to fade hair. Knowing what to watch out for can save you a lot of frustration and help you get a better result. It's like having a heads-up before you start, sort of.
- Creating Harsh Lines: This is probably the most common issue. It happens when you don't use that scooping motion enough, or when you jump too many guard sizes at once. Remember to blend gradually and use smaller guard increments, which is pretty important.
- Not Cleaning Clippers Regularly: Hair buildup can make your clippers pull and snag, leading to an uneven cut. Keep those blades clear and oiled, honestly.
- Rushing the Process: Trying to get it done quickly often results in mistakes that are hard to fix. Take your time with each section and each blend. Patience really does pay off here, you know?
- Ignoring the Hair's Natural Growth: Hair grows in different directions on different parts of the head. Pay attention to how the hair naturally lays and cut against the grain for the closest cut, or with it for a softer effect. This is something to observe, really.
- Not Using the Right Tools: Trying to do a fade with just one clipper guard or dull clippers will be a struggle. Make sure you have all the necessary equipment in good working order, which is pretty essential, actually.
- Uneven Guidelines: If your initial guidelines aren't straight and even, your whole fade will be off. Take extra time to establish those first lines correctly, which is very important.
- Forgetting to Check All Angles: What looks good from the front might look uneven from the side or back. Use mirrors to check your work thoroughly from every perspective, which is pretty much a must.
- Over-Cutting: Trying to fix a small mistake by cutting more can sometimes make it worse. If you're unsure, step away for a moment and come back with fresh eyes. Sometimes less is more, honestly.
Avoiding these common pitfalls will help you achieve a cleaner, more professional-looking fade, which is what we're aiming for, right? You can also find more resources and tips on our site by clicking here: learn more about hair cutting techniques. It's like having extra help, sort of.
Frequently Asked Questions About Fading Hair
Is it hard to do a fade haircut?
Doing a fade haircut can seem a bit tricky at first, especially if you're new to cutting hair, you know? But honestly, with the right tools and a bit of patience, it's something you can definitely learn. Many people find that once they get the hang of the basic steps and blending techniques, it becomes much easier. It's more about practice than it is about being naturally gifted, really.
What clippers do I need for a fade?
For a good fade, you’ll want a reliable set of clippers that have a strong motor and come with a range of clipper guards. Having a lever on the clippers is also very helpful for fine-tuning your blends. Additionally, a smaller trimmer or edger is pretty much essential for cleaning up the edges and creating sharp lines, which is very important for that crisp look, honestly. You don't need the most expensive ones, but decent quality makes a big difference, apparently.
How do you blend a fade haircut?
Blending a fade is all about making those transitions between different hair lengths smooth. You do this by using a scooping motion with your clippers as you move up from one guard size to the next. You also use smaller guard sizes to "attack" the visible lines, gently removing the weight from them. The clipper-over-comb technique is also a great way to blend, where you lift the hair with a comb and cut against it. It takes a bit of practice to get that seamless look, but it’s very achievable, you know?
Wrapping Things Up
So, as you can see, learning how to fade hair at home is truly a skill you can pick up. It might seem a bit much when you first start, but by breaking it down into smaller, manageable steps, you can definitely achieve a sharp, clean look. Remember, it’s all about having the right tools, preparing your hair and clippers properly, and then carefully working through each section, blending as you go. With a bit of practice, you’ll be creating those smooth, professional-looking fades in no time, which is pretty cool, honestly. Just keep at it, and you'll get better with every haircut, you know?
For more insights and professional tips on hair care and cutting, you might find this article on WikiHow's guide to fading hair quite useful. It's another good resource to check out, honestly.


Detail Author:
- Name : Gianni Skiles
- Username : sipes.arnaldo
- Email : white.devonte@mosciski.info
- Birthdate : 1977-02-02
- Address : 611 Xavier Plains West Ollieville, ME 59414
- Phone : 757.852.4735
- Company : Rodriguez, Hermann and Reinger
- Job : Lay-Out Worker
- Bio : Beatae tempora vero quisquam eum modi. Aspernatur harum ipsa aut sint nihil praesentium earum. Dicta voluptatibus doloribus voluptatem non odio. Dolorem rerum culpa corporis doloremque ut quasi sint.
Socials
instagram:
- url : https://instagram.com/karlee.zulauf
- username : karlee.zulauf
- bio : Sapiente ea nam suscipit possimus quis qui vel. Inventore eos possimus totam excepturi.
- followers : 3668
- following : 2800
tiktok:
- url : https://tiktok.com/@zulaufk
- username : zulaufk
- bio : Modi repudiandae repudiandae ab quibusdam perferendis maxime.
- followers : 3750
- following : 526
