
Have you ever looked at a regular necktie and wondered if it could become something else, perhaps a bit more festive or formal? It’s a common thought, you know, especially when a special event comes up. Many folks think a bow tie needs its own unique piece of fabric, but that’s not always the story. As a matter of fact, you can absolutely transform a standard necktie into a charming bow tie, giving your outfit a fresh spin without needing to buy a whole new accessory. This clever trick is quite useful for those moments when you want to stand out a little, or just try something different with what you already own, basically.
Learning how to tie a bow with a tie opens up a whole new world of style possibilities, you see. It’s a bit like learning different ways to tie a regular tie, like the Windsor or the 4-in-hand knot, which Ties.com often covers in their comprehensive guides. This particular method, however, takes that versatility a step further, allowing you to create a distinct look that’s both elegant and a little unexpected. It's a skill that, honestly, once you get the hang of it, feels pretty rewarding to pull off.
This guide will walk you through the steps, making it simple to grasp, you know. We'll cover everything from choosing the right necktie to the final adjustments, helping you achieve that crisp, classic bow tie shape. You’ll find that with a little practice, this technique can become a quick way to add a touch of flair to your wardrobe, and it’s really quite practical for today’s varied events. So, let’s get into the details of making that transformation happen.
Table of Contents
- Understanding the Basics of Your Tie
- Choosing the Right Tie for a Bow Look
- Getting Started: Preparing Your Necktie
- The First Cross: Setting the Foundation
- Creating the First Loop: The Bow's Beginning
- Bringing It Over: Securing the First Half
- The Second Loop: Completing the Bow Shape
- Tightening and Shaping: Making It Look Good
- Common Challenges and Simple Solutions
- Why This Trick Matters: Style and Practicality
- Frequently Asked Questions (FAQs)
Understanding the Basics of Your Tie
Before you even begin to think about how to tie a bow with a tie, it helps to know a little about the ties themselves, you know. A tie, by its very meaning, is something used to fasten, attach, or close. This idea of fastening is pretty central to all tie knots, whether it's a simple knot or something more involved like an Eldredge or Trinity knot. Your standard necktie, the kind you might wear to a business meeting, is typically a long strip of fabric, usually silk, cotton, or a blend, and it has a wide end and a narrow end. The way it's made gives it the flexibility needed for all sorts of shapes, which is pretty neat.
The material of your tie, actually, plays a big part in how well it will hold a bow shape. Silk ties, for instance, often have a nice drape and a bit of stiffness that helps them keep their form. Cotton ties, on the other hand, might be a little softer and need more careful shaping. Knowing these small details about your tie can really make a difference as you work through the steps, honestly. It’s not just about the knot; it’s about the fabric too, in a way.
Choosing the Right Tie for a Bow Look
Selecting the perfect necktie for this transformation is, you know, a pretty important first step. Not all neckties are created equal when it comes to becoming a bow tie. You'll want to pick one that isn't too wide at its broadest point, perhaps no more than three inches across, as a general rule. If the tie is too wide, the resulting bow can look bulky or just a little bit too large for your collar, which isn't the look we're going for.
The length of the tie also matters, you see. A standard length tie, usually around 57 to 60 inches, works well for most people. If your tie is much shorter, you might find it hard to get enough material to form both loops of the bow. Conversely, an extra-long tie might leave you with too much excess fabric, making the knot feel clumsy. So, finding that sweet spot in terms of length and width is, honestly, key to a good outcome, you know.
Think about the fabric, too. A tie with a bit of body, like a good quality silk or a slightly thicker cotton, will hold its shape better. Very thin or flimsy ties might collapse easily, making the bow look less defined. Also, consider the pattern. A solid color or a subtle pattern often works best for a makeshift bow tie, as busy patterns can become overwhelming when folded into a smaller shape. Really, it's about finding a tie that offers a good balance of structure and style, you know.
Getting Started: Preparing Your Necktie
Okay, so you’ve picked out your tie, which is great. Now, let’s get ready to make this happen. The first thing to do is to drape the tie around your neck, just as you would for a regular knot. Make sure the wide end is on your right side and the narrow end is on your left. This initial setup is, honestly, pretty crucial for getting the proportions right later on, you know.
Adjust the tie so that the wide end hangs a bit lower than the narrow end. This might feel counter-intuitive if you're used to tying a regular tie, where the wide end is usually much longer. For a bow tie, you need a good amount of length on the narrow side to form one of the loops. A good starting point is to have the narrow end reach around your belly button area, while the wide end hangs a few inches below that. This positioning is, in a way, like setting up your canvas before you start painting.
Make sure the tie sits comfortably around your collar. It shouldn't be too tight or too loose. The goal is to have a good foundation, so the knot you create feels natural and secure. This preparation step, basically, sets the stage for all the twisting and folding that comes next, you know, so take a moment to get it just right.
The First Cross: Setting the Foundation
Now, with your tie draped around your neck, you're ready for the first real step in learning how to tie a bow with a tie. Take the wide end of the tie and cross it over the narrow end. This is a simple move, but it forms the very center of your future bow. It's like laying down the first brick of a wall, basically.
Once the wide end is crossed over, bring it up underneath the narrow end and pull it through the loop around your neck. This creates a simple knot, kind of like the first step in tying your shoelaces, you know. Make sure this initial knot is snug against your collar, but not so tight that it feels uncomfortable. It should sit neatly, forming the base from which the bow will emerge, pretty much.
This step, honestly, is about creating a stable anchor point. The tighter and neater this initial cross is, the more defined your bow tie will be. Don't worry about perfection just yet, though. You'll have chances to adjust things later on. Just focus on getting that first cross firm and centered, you know, right where you want the bow to sit.
Creating the First Loop: The Bow's Beginning
With that initial knot in place, you’re ready to shape the first part of your bow. Take the narrow end of the tie, the one that’s now hanging down. Fold it horizontally across your collar, making a loop that will become one side of your bow. This loop should be roughly the width you want your finished bow tie to be, so think about that as you fold it. It’s kind of like making a ribbon shape, you know.
Hold this loop in place with one hand, right at the center of your collar. This is where the knot will eventually form. The length of this loop will determine the size of one of your bow tie wings, so try to make it even and symmetrical. This step, honestly, requires a bit of precision, as it sets the visual scale for the whole piece. You want it to look balanced, you know.
This folded narrow end is, essentially, the first "wing" of your bow tie. Keep it flat and neat, as any wrinkles here will show in the final product. It’s a foundational piece, so getting it right now saves you adjustments later. Just hold it gently but firmly in position, ready for the next move, you know.
Bringing It Over: Securing the First Half
Now, take the wide end of the tie, the one that’s still hanging down. Bring it straight down over the center of the loop you just created. This action helps to secure that first loop and begins to form the structure of the bow. It’s like wrapping a band around the middle of something, you know, to hold it together.
After bringing it down over the loop, thread the wide end up through the neck loop from underneath. This is similar to how you’d make the second pass in a standard tie knot. Pull it through gently, making sure not to disturb the loop you’re holding. This move creates the central knot of the bow tie, basically, pulling everything together.
As you pull the wide end through, it should emerge from behind the first loop, creating a sort of "bridge" over it. This is where the magic starts to happen, really. You’re beginning to see the bow tie shape take form, and it's pretty satisfying. Just keep things neat and don't pull too hard just yet, you know.
The Second Loop: Completing the Bow Shape
With the wide end now threaded through, it’s time to create the second loop, which will form the other wing of your bow tie. Take that wide end and fold it to create another loop, mirroring the first one you made. This loop will go through the "bridge" you just created with the wide end, you know, sort of tucking it in.
Carefully push this newly formed loop through the opening that was created when you brought the wide end over and through. This can be a bit tricky, so take your time. You're essentially threading one loop through another, which is, in a way, the core of tying a bow. It’s a bit like threading a needle, but with fabric, you know.
Once you’ve pushed the second loop through, you’ll see the full bow tie shape begin to emerge. Both loops should now be visible, and the center knot should be holding them in place. This is where the bow really starts to look like a bow, and it’s pretty exciting to see it come together, honestly. Just make sure everything feels loose enough to adjust.
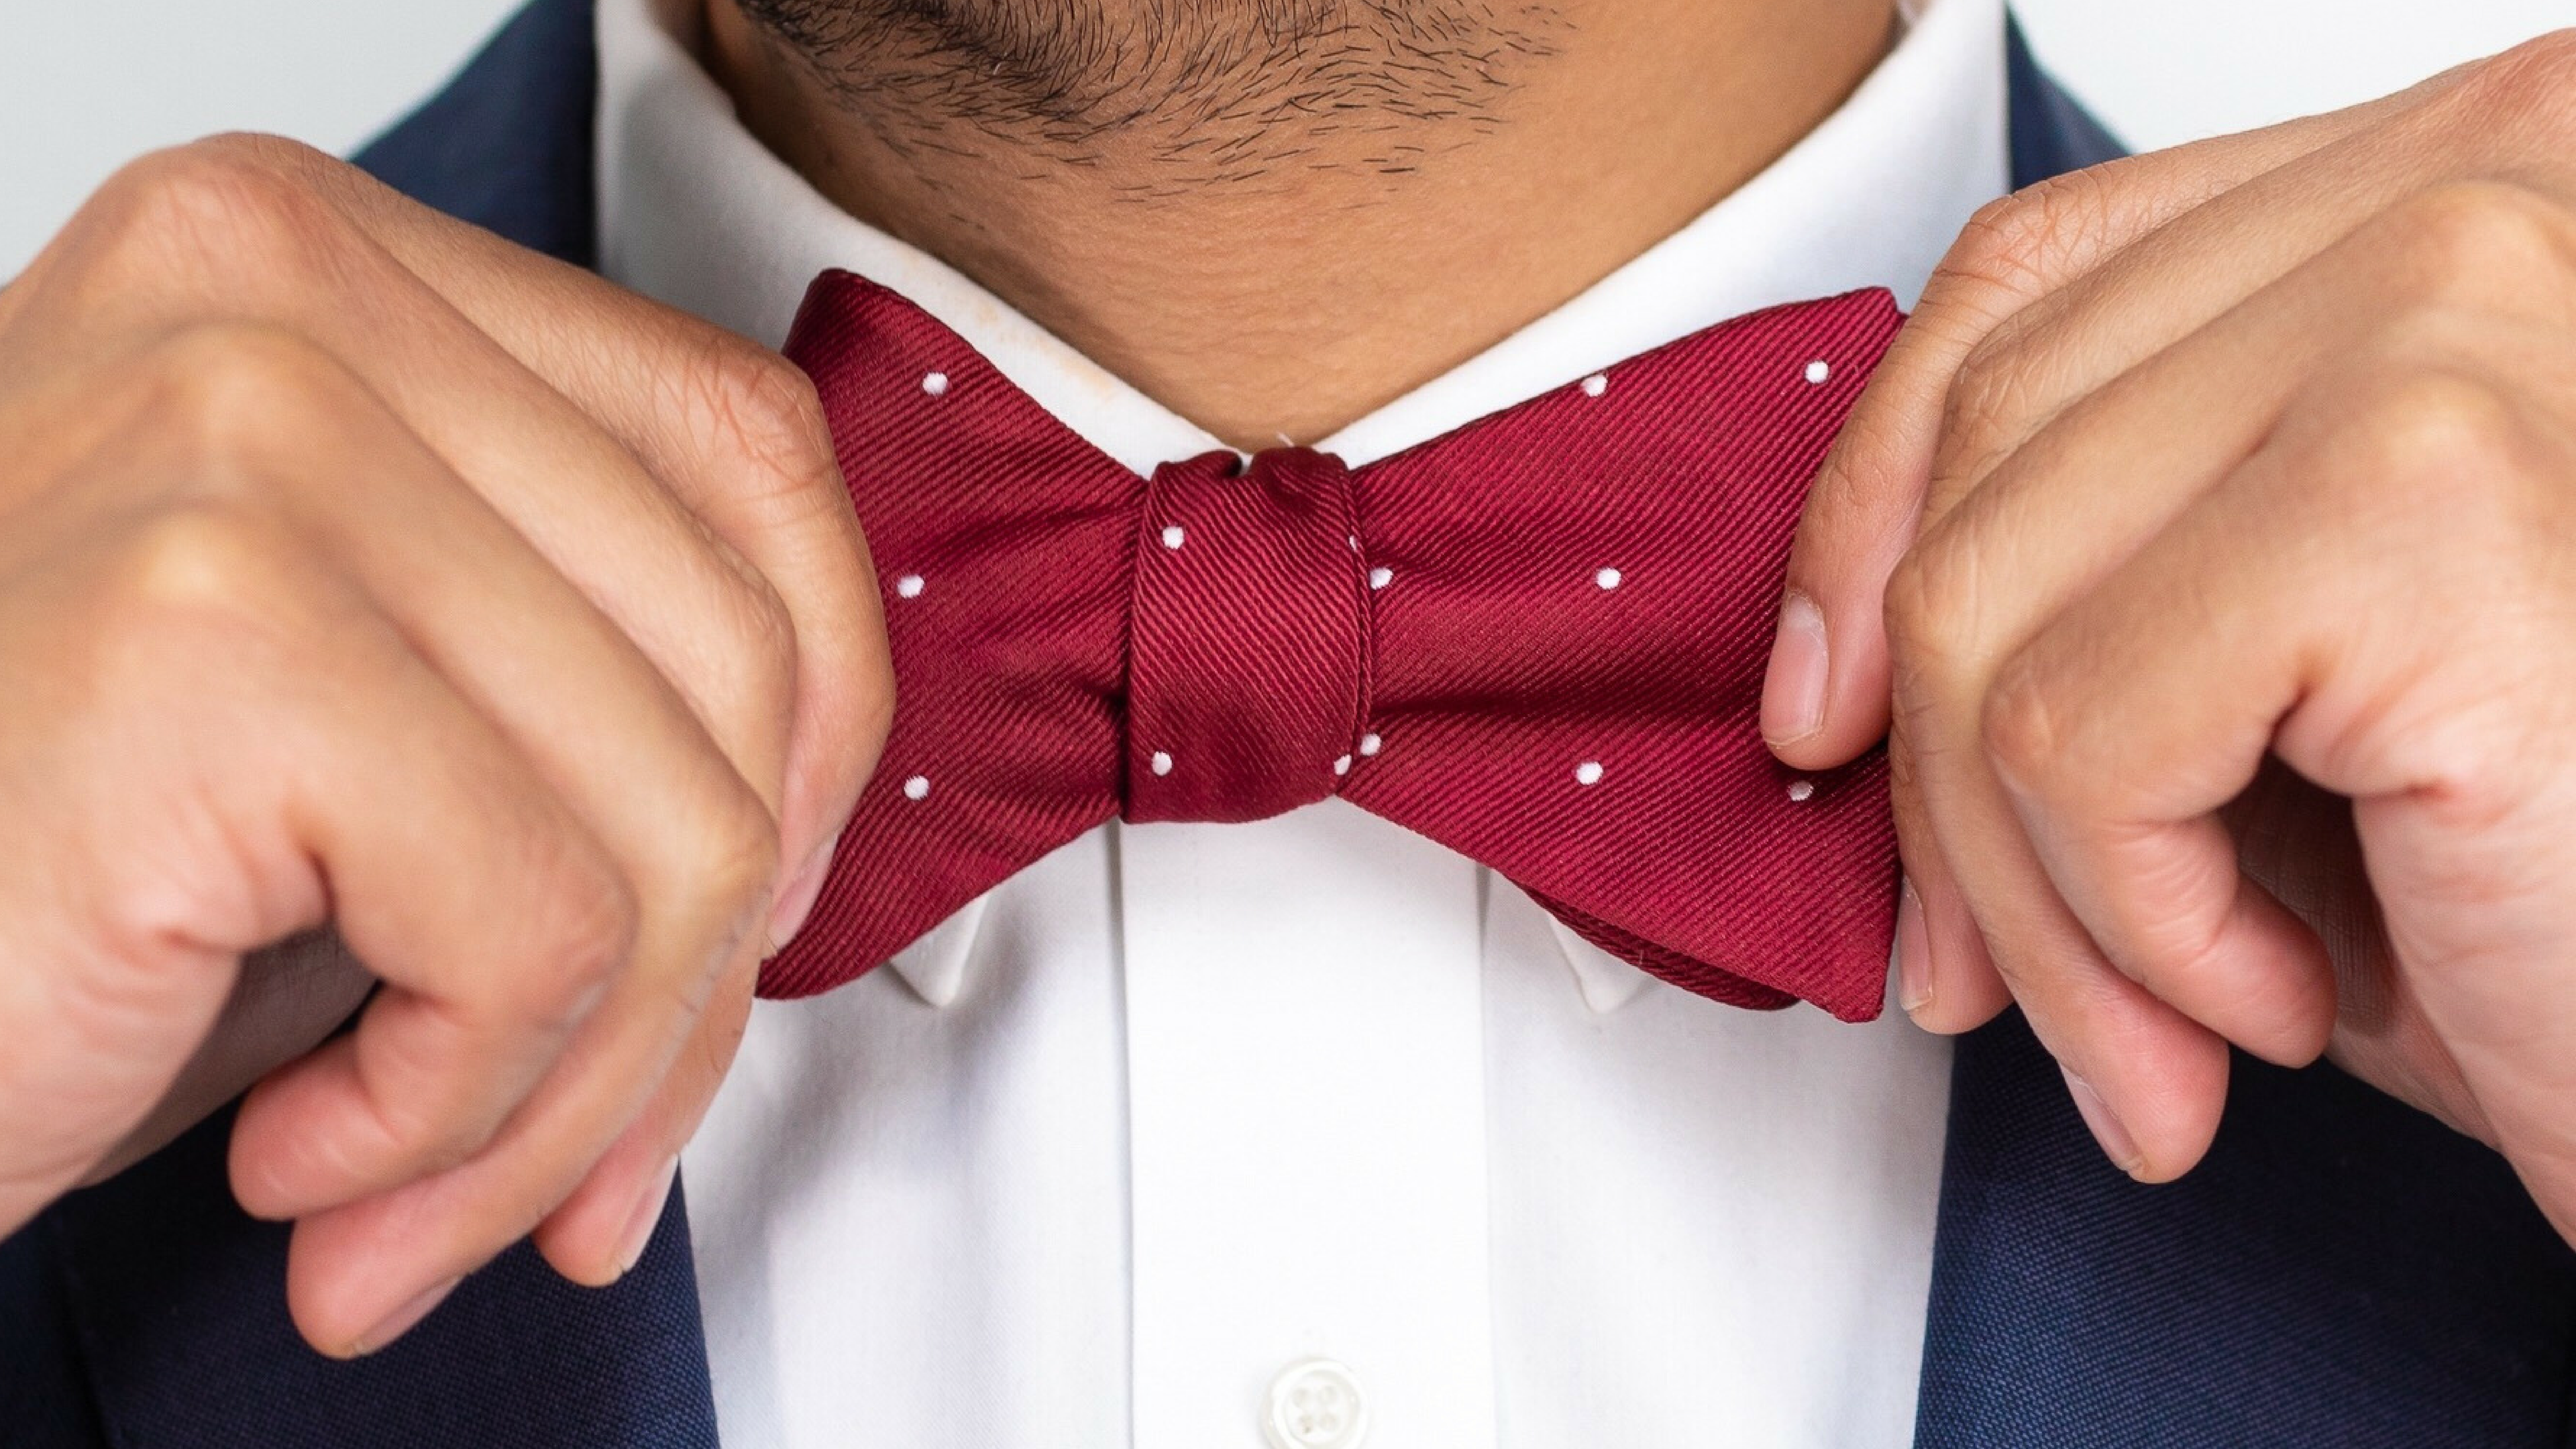
Tightening and Shaping: Making It Look Good
Now that both loops are in place, it’s time for the final touches: tightening and shaping. This step is, arguably, the most important for achieving a polished look. Gently pull on both ends of the tie – the narrow end and the wide end – simultaneously. This will tighten the knot in the center of your bow. You want it to be firm, but not so tight that it distorts the loops, you know.
As you tighten, use your fingers to adjust the loops and make them symmetrical. Pull one side out a little, push the other in, until both "wings" of the bow look even and balanced. You can also adjust the knot in the center, making sure it sits neatly and flat against your neck. This shaping process is, basically, what gives your bow tie its crisp, professional appearance, you know.
Don’t be afraid to take your time with this part. It might require a few tries to get it just right, and that’s perfectly normal. The goal is to create a bow that looks intentional and well-formed, not something that just happened. A well-shaped bow tie, honestly, adds a lot to your overall presentation, so it’s worth the effort, you know.
Common Challenges and Simple Solutions
Learning how to tie a bow with a tie can have a few small bumps along the way, and that's totally okay. One common challenge is getting the loops to be even. Sometimes one side ends up a bit longer or wider than the other. If this happens, don't worry. You can simply loosen the knot slightly and gently pull on the loops to redistribute the fabric until they look balanced. It’s all about small adjustments, you know.
Another thing people sometimes struggle with is keeping the knot tight enough without making it too stiff. If your bow tie feels loose, it might flop around. If it's too tight, it can feel uncomfortable and look squished. The trick here is to pull firmly but gradually. You want a secure knot, but one that still allows the fabric to breathe a little, basically. Practice really helps with this feel, you know.
Sometimes, the tie material itself can be a challenge. A very slippery silk might not hold its shape as easily as a textured cotton. If you're using a slippery tie, you might need to apply a bit more pressure when tightening and shaping. For a tie that's too thick, you might find the knot becomes bulky. In that case, perhaps try a different tie for this particular trick. Experimenting with different ties is, in a way, part of the fun, you know.
Why This Trick Matters: Style and Practicality
Knowing how to tie a bow with a tie is more than just a party trick; it's a really useful skill, you know. For one, it offers incredible versatility. Imagine you're heading to an event that starts out semi-formal, where a necktie is perfect, but then transitions to something more celebratory later in the evening. With this trick, you can, honestly, transform your look on the fly, going from a classic necktie to a dashing bow tie without needing to carry an extra accessory. It's pretty convenient, basically.
This skill also speaks to resourcefulness and a bit of style flair. It shows that you can adapt and create a sophisticated look with what you have. It’s a conversation starter, too. People often notice a well-done bow tie, and when they learn it was made from a regular necktie, it's always a pleasant surprise. It adds a unique touch to your personal presentation, you know, and that's something people appreciate.
Beyond special occasions, this technique can just be a fun way to experiment with your wardrobe. It lets you repurpose ties you might not wear often, giving them a new life. And let’s be honest, getting a crisp, well-formed bow tie out of a necktie feels pretty good. It’s a small victory in personal style that, in a way, boosts your confidence. So, giving this a try can really change your look, you know, and add a little something extra to your style repertoire. You can learn more about tying techniques on our site, and explore more style tips to broaden your fashion horizons.
Frequently Asked Questions (FAQs)
Can you really make a bow tie from a regular tie?
Yes, absolutely! It might seem like a complex idea, but with the right technique and a bit of practice, you can turn a standard necktie into a neat bow tie. It's a clever way to get a different look without needing a separate accessory, you know.
What kind of tie works best for this?
For the best results, pick a necktie that isn't too wide, ideally around three inches across at its widest point. Ties made of silk or a slightly thicker cotton tend to hold their shape well. Avoid ties that are too thin or too bulky, as they can make the bow look messy or too large, basically.
Is it hard to do?
Like learning any new knot, it might take a few tries to get the hang of it. The steps are straightforward, but getting the tension and symmetry just right needs a little patience. With some practice, it becomes much easier, and you’ll be able to tie a bow with a tie pretty quickly, you know.


Detail Author:
- Name : Prof. Max Moore DVM
- Username : susanna31
- Email : riley30@schuster.com
- Birthdate : 1973-03-17
- Address : 65800 Anika Cliff Apt. 046 Idellside, KY 83667-7783
- Phone : 313-249-8766
- Company : Stamm, Windler and Cremin
- Job : Photographer
- Bio : Quibusdam voluptas ut pariatur molestiae. Omnis vero distinctio aut non aut eum doloribus. Officia porro ducimus ea deleniti voluptatem a. Velit ut non molestiae.
Socials
tiktok:
- url : https://tiktok.com/@sstokes
- username : sstokes
- bio : Consectetur incidunt libero corrupti deserunt. Iusto in libero qui qui.
- followers : 5569
- following : 1805
instagram:
- url : https://instagram.com/stokess
- username : stokess
- bio : Odit eos id dolorum. Sit deleniti quasi nihil nostrum. Voluptates qui ipsum est fuga.
- followers : 1933
- following : 1065
twitter:
- url : https://twitter.com/stokess
- username : stokess
- bio : Est culpa repellendus iste error earum animi similique. Et quia deleniti laborum consequatur eos reprehenderit. Aut voluptatibus minus illo aut.
- followers : 6134
- following : 530
